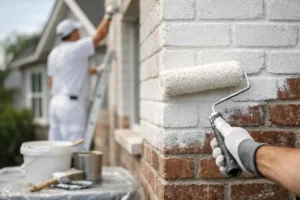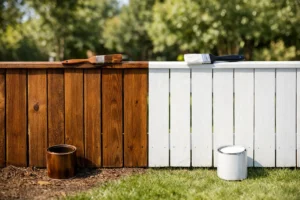
A fresh coat of paint can make a worn living room feel cared for again, give dated cabinets a cleaner look, or protect an exterior before Kansas weather takes a greater toll. The difference between a satisfying result and a project that drags on usually comes down to planning before the first drop cloth is spread. This residential repainting planning guide helps you make practical decisions about scope, timing, color, preparation, and professional scheduling.
Start Your Residential Repainting Planning Guide With Scope
Begin by identifying what you want the project to accomplish. A repaint may be about making a home feel more current, preparing it for sale, covering everyday wear, or protecting surfaces that are exposed to sun, moisture, and temperature changes. The goal affects the products, prep work, budget, and schedule.
Walk through the property with a notepad and look beyond the wall color. Mark scuffs, nail holes, peeling paint, water stains, cracked caulk, damaged trim, and areas where previous paint is failing. For exterior work, pay close attention to fascia, siding joints, window trim, porch rails, deck boards, and fence pickets. Paint can improve appearance and provide protection, but it cannot correct a moisture issue, rotted wood, or an unstable surface on its own.
It also helps to separate must-do work from nice-to-have updates. Repainting the main living areas, entry, and exterior trim may have a higher immediate value than adding color to every closet or storage room. A clear project scope allows for a more accurate estimate and keeps last-minute additions from disrupting your timeline.
Decide What Stays and What Changes
Not every surface needs the same level of attention. Walls with sound paint may only need cleaning, patching, and repainting. Cabinets, glossy trim, stained wood, and previously painted exterior surfaces often require more detailed preparation to achieve a durable finish. If you are changing from a dark color to a light one, or from stained wood to paint, expect additional labor and materials.
Ask yourself whether the repaint should blend with existing floors, countertops, roofing, brick, and furnishings or create a larger visual change. Keeping some permanent elements in mind prevents a color choice from looking disconnected once the work is complete.
Set a Budget That Includes Proper Preparation
The lowest quote is not always the lowest-cost choice over time. A paint job that skips patching, sanding, caulking, cleaning, or primer may look acceptable for a short period, then show peeling, flashing, rough texture, or uneven coverage. Preparation is where durable work begins.
When reviewing an estimate, make sure you understand which surfaces are included, how repairs are handled, what paint and finish are specified, and whether moving furniture, protecting floors, and daily cleanup are part of the service. Exterior estimates should clarify whether loose paint removal, caulking, minor wood repair, and surface washing are included.
Price can vary for good reasons. High ceilings, detailed trim, occupied rooms, difficult access, damaged surfaces, and major color changes all add time. Cabinet painting and exterior staining also require different steps than standard wall painting. A dependable contractor should explain those factors clearly rather than leaving you to guess why one proposal differs from another.
If your budget is limited, consider completing the work in phases. Start with the rooms that receive the most use, the exterior areas with the greatest exposure, or the surfaces most visible from the street. A phased plan can still deliver a noticeable improvement without cutting corners on materials or preparation.
Choose Colors and Finishes for Real Life
Paint color is personal, but it should also work with how your household uses the space. Soft neutrals can make connected rooms feel more open and flexible. Richer colors can add definition to a dining room, office, powder room, or accent wall. Before committing, view large samples on different walls and check them in morning light, afternoon sun, and evening indoor lighting.
Kansas homes often experience bright sun that can make exterior colors appear lighter than they do on a small paint chip. Interior color can shift just as much near north-facing windows, warm flooring, or LED lighting. Testing samples is a small step that can prevent a costly change after the painting is underway.
Finish matters as much as color. Flat finishes can soften minor wall imperfections but are less washable. Eggshell and satin finishes are popular for many living spaces because they offer a balance of appearance and cleanability. Semi-gloss is commonly used for trim, doors, and cabinets because it stands up well to handling and cleaning, though its sheen can highlight surface flaws if preparation is rushed.
For homes with children, pets, busy hallways, or frequent entertaining, choose finishes that can handle regular cleaning. For exterior work, select coatings suited to the surface and local exposure conditions. The right product for wood siding is not automatically the right choice for masonry, metal, or composite materials.
Plan Around Weather, Access, and Household Routines
Interior painting can be completed throughout much of the year, but the schedule still deserves attention. Think about family events, work-from-home days, new flooring installation, moving dates, and other renovation activity. Painting before new carpet or flooring is often easier, while cabinet painting may need to be coordinated around kitchen use.
Exterior painting depends more heavily on weather and surface conditions. Paint needs appropriate temperatures, dry surfaces, and enough time to cure. Rain, heavy humidity, extreme heat, and rapid temperature swings can affect application and drying. A professional crew should monitor conditions and adjust the schedule when needed rather than forcing a coating onto a surface that is not ready.
Access is another practical consideration. Trim back shrubs near siding, move patio furniture, secure pets, and make sure gates are unlocked when exterior work begins. Inside, remove fragile items, clear smaller furniture from the work area, and identify rooms that need to remain available for children, remote work, or guests. Good coordination protects your belongings and helps the crew maintain a steady pace.
Prepare Without Taking On the Crew’s Job
Homeowners do not need to complete every prep task themselves. In fact, professional surface preparation is a major reason to hire experienced painters. Still, a little advance organization can make the project more efficient.
Before the crew arrives, remove wall décor, curtains, outlet covers if requested, and personal items from shelves or countertops. Move valuables and small breakables out of the work zone. Communicate any areas that need special care, such as antique furniture, recently refinished floors, or rooms with limited ventilation.
Avoid patching or priming randomly unless it has been discussed with your painter. Inconsistent repairs can create visible texture differences once the final coat is applied. A professional team can assess the surface and use compatible materials for a uniform result.
Select a Contractor Who Explains the Process
A residential repainting project should not leave you wondering who will arrive, what will happen each day, or when your rooms will be usable again. Look for a contractor that provides a clear written estimate, explains the preparation process, uses quality materials, and respects your home while work is in progress.
Communication matters especially when the project involves multiple rooms, exterior repairs, cabinet transformations, or a tight deadline. Ask how the crew will protect floors and landscaping, manage dust, clean up at the end of the day, and handle touch-ups after the final walkthrough. You should also confirm insurance coverage and ask about workmanship satisfaction policies.
Royal Painting approaches each project with clear expectations, careful preparation, punctual service, and daily cleanliness. That kind of process is not an extra detail. It is how a painting project stays organized while your home remains livable.
Confirm the Final Details Before Work Begins
A few days before the start date, review the colors, finishes, rooms, surfaces, and any approved repairs. Confirm where paint will be stored, how the crew will access the home, and the best contact person for questions during the project. If you have pets or security systems, share instructions in advance.
Keep one final walkthrough on the schedule. This is the time to inspect the finish in normal lighting, check that requested areas were completed, and identify any touch-ups. Small details such as clean lines at trim, consistent coverage, smooth patched areas, and properly reinstalled hardware contribute to the polished result you expect.
A well-planned repaint is more than a color change. It is a practical investment in how your home looks, feels, and holds up over time. When you define the scope, allow for proper prep, choose materials for your lifestyle, and work with a reliable crew, the process becomes far less disruptive and the finished space feels ready to enjoy.