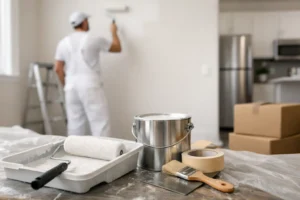
A fresh coat of paint cannot hide a wall that is dirty, damaged, glossy, or uneven. It may look better for a few days, but flaws often reappear once the paint dries and light hits the surface. Knowing how to prepare walls professionally is what separates a quick paint job from a clean, durable finish that improves the room for years.
For homeowners, proper preparation protects the time and money invested in painting. For apartment managers and commercial property owners, it helps crews produce consistent results across multiple rooms or units without costly touch-ups later. The process is straightforward, but each step matters because paint needs a clean, sound surface to bond correctly.
Start With a Close Wall Inspection
Professional preparation begins before a drop cloth goes down. Walk the room in natural light and with the lights turned on. Look across the wall from an angle, not just straight on. This reveals nail holes, dents, peeling paint, drywall seams, water stains, and previous patchwork that can disappear at one angle and stand out at another.
Pay special attention to high-traffic areas around doors, hallways, light switches, stairwells, and furniture. These spots often have scuffs, hand oils, adhesive residue, or small impacts that affect the final appearance. In kitchens, laundry rooms, and bathrooms, check for grease, soap residue, moisture damage, and signs of mildew.
A wall with bubbling or peeling paint needs more than a light sanding. The failed paint must be removed until the remaining edges are firm. If a stain, leak, or soft drywall is present, address the source before painting. Covering an active moisture issue only delays a bigger repair.
Protect the Room Before Wall Prep Begins
Good preparation includes the space around the walls. Move furniture out when possible. When it must stay in the room, place it in the center and cover it completely. Floors should be protected with durable drop cloths or appropriate floor coverings, especially near work areas where sanding dust and patching material can fall.
Remove outlet covers, switch plates, curtain hardware, wall décor, and other removable items for cleaner edges. A professional crew also masks trim, flooring, cabinetry, and fixtures as needed. This takes extra time at the beginning, but it prevents splatters and reduces cleanup at the end of the project.
For occupied homes, offices, or apartment units, containment is part of courteous service. Dust should be controlled, work areas kept orderly, and tools organized so the property remains as functional as possible during the job.
Clean Walls So Paint Can Bond
Paint does not adhere well to dust, grease, smoke film, hand oils, or household residue. Even walls that appear clean can carry enough buildup to interfere with adhesion, particularly in kitchens, bathrooms, entryways, and commercial spaces.
Start by dusting the walls, ceiling line, corners, and baseboards. A vacuum with a soft brush attachment or a microfiber cloth works well for loose dust and cobwebs. Then wash areas with visible grime using a mild cleaner suited to the surface. Kitchen walls may require a degreasing cleaner, while bathrooms may need a product that removes soap film and mildew residue.
Avoid soaking drywall. Use a damp sponge or cloth, rinse away cleaner residue when required, and allow the walls to dry fully. Painting over a damp surface can lead to poor adhesion, blistering, and an uneven sheen. When the condition of the wall calls for stronger cleaning products, follow the manufacturer instructions and ventilate the room.
Repair Holes, Cracks, and Damaged Drywall
Small nail holes can be filled quickly, but larger defects require a more careful approach. Press spackle or joint compound into the opening rather than simply smoothing material across the surface. The goal is to fill the void completely, then feather the patch beyond its edges so it blends into the surrounding wall.
For deeper dents, wide cracks, or damaged drywall paper, more than one coat of compound may be necessary. Each coat should dry before the next is applied. Rushing this stage can leave a patch that shrinks, cracks, or shows through the paint.
Hairline cracks often occur where walls settle or where drywall seams move slightly. Some can be repaired with joint compound and tape, while others may need a flexible caulk depending on their location and cause. If cracks keep returning, have the area evaluated rather than repeatedly painting over it.
Water-stained drywall deserves extra attention. Once the leak or moisture problem has been resolved and the surface is dry, replace any damaged material that has softened or deteriorated. Stain-blocking primer can help prevent discoloration from bleeding through the finish coat, but primer is not a substitute for repairing compromised drywall.
Sand for a Smooth, Even Surface
Sanding is where wall preparation begins to look professional. The purpose is not to remove every bit of existing paint. It is to level patch repairs, knock down raised texture, dull glossy areas, and create a surface that accepts new paint evenly.
Use a fine-grit sanding sponge or sandpaper for most wall repairs. Sand patched areas until the transition feels smooth when you run your hand across it. Then lightly sand the wider wall surface where needed, especially if the previous coating has a sheen or there are visible roller ridges.
Do not rely on sight alone. A repair can look flat but still feel raised at the edge. Run your palm over the wall and inspect it with a work light held at an angle. This simple check catches many flaws before paint makes them more noticeable.
After sanding, remove all dust. Vacuum the wall and surrounding surfaces, then wipe with a clean microfiber cloth. Painting over sanding dust can create a rough finish and weaken adhesion. This is also why professionals keep the work area clean between stages instead of treating cleanup as an afterthought.
Know When Priming Is Necessary
Not every repaint requires a full coat of primer, but many walls benefit from it. Primer improves adhesion, evens out porosity between patches and existing paint, blocks certain stains, and helps color look more uniform. It is especially useful when changing from a dark color to a light one, painting new drywall, covering repairs, or coating a glossy surface.
The right primer depends on the wall condition. A stain-blocking product may be needed for water marks, smoke stains, or tannin bleed. Bonding primer is often the better choice for slick, glossy, or previously oil-painted surfaces. In other cases, a quality paint-and-primer product may be sufficient, but it depends on the substrate and the color change.
Spot priming small repairs can work when the surrounding paint is in good shape. However, a fully primed wall often delivers the most consistent sheen in rooms with extensive patching, significant stains, or major color changes. That consistency matters on walls with direct sunlight or bright overhead lighting, where flashing and uneven absorption are easier to see.
How to Prepare Walls Professionally in Older Properties
Older homes and buildings can bring additional preparation concerns. Multiple layers of old paint, fragile plaster, wallpaper adhesive, and hidden repairs all need a measured approach. Aggressive scraping or sanding can damage delicate surfaces and create more work than it solves.
If paint may contain lead, particularly in a pre-1978 property, do not dry sand, scrape, or disturb it without proper testing and safe work practices. Lead paint requires containment and trained handling procedures. The same caution applies to suspected mold growth or significant water damage.
Wallpaper removal also calls for patience. Every bit of adhesive must be removed, because remaining paste can reactivate under water-based paint and cause peeling. In some cases, repairing and priming the wall after removal is more time-consuming than the actual painting, but it is necessary for a finish that stays put.
Why Professional Wall Preparation Pays Off
The most visible parts of a paint project are the color and final coat, yet the lasting quality is decided much earlier. Proper preparation helps paint spread evenly, improves coverage, reduces visible repairs, and lowers the chance of peeling or premature wear. It also makes touch-ups less noticeable later.
For a single living room, careful prep can turn an ordinary repaint into a polished update. Across an apartment turnover or commercial interior, consistent preparation helps every room meet the same standard while keeping the project organized and on schedule. The trade-off is time: skipping preparation may make day one faster, but it often creates callbacks, extra coats, and avoidable disruption.
When walls have extensive damage, stubborn stains, high ceilings, or signs of moisture, bringing in an experienced painting contractor can save considerable effort and uncertainty. Royal Painting approaches preparation with the same care given to the final coat, keeping work areas clean while focusing on durable, refined results.
Before choosing a color or opening a paint can, take time to assess what is underneath. A clean, repaired, sanded, and properly primed wall gives every finish its best chance to look sharp from the first day and hold up through everyday life.