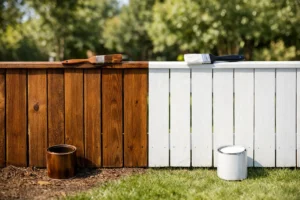
A vacant unit can lose money every day it sits unfinished. A clear apartment turnover painting checklist helps property managers move from move-out inspection to a clean, tenant-ready apartment without missed repairs, unnecessary repainting, or scheduling delays. The goal is not simply to put fresh color on the walls. It is to protect the property, present the unit well, and get the next resident moved in on time.
Start With a Room-by-Room Condition Review
Painting decisions should begin after the unit is empty, cleaned enough to reveal damage, and fully documented. Walk every room in the same order so nothing gets overlooked. Take dated photos before any work begins, especially where there are stains, holes, peeling paint, moisture marks, or tenant-caused damage that may affect the deposit process.
Look closely at high-contact surfaces. Entry walls, hallways, kitchens, bathrooms, doors, trim, and areas around light switches typically show wear first. Also check ceilings near bathrooms, windows, and plumbing fixtures. A water stain is not just a paint issue. The source of moisture must be corrected before priming and repainting, or the discoloration may return.
Use this initial review to separate the work into three categories: touch-up, repaint one wall or surface, or repaint the entire room. Touch-ups can save time when the original paint is known, the finish is still in good condition, and fading is minimal. In many turnover units, however, a partial repair stands out because paint ages differently from wall to wall. Repainting the full wall is often the better value when appearance matters.
Apartment Turnover Painting Checklist Before Work Begins
Once the condition review is complete, confirm the scope and sequence of work before painters arrive. This prevents a crew from working around unfinished repairs or having to return because another trade damaged a completed wall.
- Photograph and document all wall, ceiling, trim, door, and cabinet damage.
- Confirm that leaks, plumbing repairs, drywall repairs, pest treatment, and electrical work are complete.
- Remove abandoned belongings, wall hardware, adhesive strips, nails, and picture hangers.
- Verify which items will stay in the unit, including appliances, blinds, mirrors, and shelving.
- Match approved paint colors and sheens to the property standard.
- Identify accent walls, specialty finishes, or surfaces that need a different coating.
- Schedule painting after dusty repairs and before final cleaning, flooring installation, and maintenance punch work when possible.
- Confirm unit access, parking, keys, lockbox procedures, and the required completion date.
A written scope is especially useful for multiple vacancies. It keeps expectations consistent across units and gives ownership a clearer basis for comparing costs. It should identify each room, the surfaces being painted, the selected color and sheen, and any repairs or stain-blocking primer required.
Choose Paint for Turnover Speed and Long-Term Wear
The lowest-priced gallon is rarely the lowest turnover cost. Apartment walls need coatings that apply consistently, cover well, clean easily, and hold up to repeated maintenance. Paint that scuffs quickly or requires extra coats may create more labor and more frequent repainting over time.
For most units, a neutral, property-approved wall color makes future touch-ups and repaints easier to manage. Flat paint hides minor wall imperfections, but it can be difficult to clean in busy areas. Eggshell or satin often provides a more washable finish for living spaces, hallways, and bedrooms, although higher sheen can reveal poor drywall repairs. Kitchens and bathrooms usually benefit from a durable, moisture-resistant finish, while doors and trim often need a tougher semi-gloss or satin coating.
There is no single sheen that fits every property. A newer building with smooth walls may perform well with washable eggshell throughout. An older property with patched drywall may need a lower sheen to keep imperfections from becoming more visible. Consistency matters more than chasing trends. Keep accurate records of product names, colors, sheens, and purchase locations so future work can be completed without guesswork.
Prepare Surfaces Instead of Painting Over Problems
Professional results are built during prep. Painting over grease, dust, loose drywall compound, smoke residue, or failed caulk may make a unit look better briefly, but the finish will not last. Prep also reduces visible flashing, peeling, and uneven texture after the paint dries.
Walls should be cleaned where needed, especially around kitchens, bathrooms, switches, doors, and vents. Holes and dents need to be filled, sanded smooth, and checked under proper lighting. Larger holes, damaged corner bead, cracked tape joints, and soft drywall call for repair rather than a quick layer of compound.
Prime repaired areas before topcoating. Use a stain-blocking primer for water marks, nicotine, crayon bleed, smoke staining, or other discoloration that can migrate through new paint. Fresh drywall repairs and patches absorb paint differently than existing walls, so spot priming helps the final coat look uniform.
Do not overlook caulk. Small gaps around trim, baseboards, and door casings can make an otherwise clean paint job look unfinished. Failed caulk should be removed and replaced with paintable material. If trim has dents, chips, or heavy wear, plan for the repair and coating as part of the same scope rather than treating it as an afterthought.
Plan the Work in the Right Order
A turnover schedule works best when each trade has a defined window. Painting too early can mean repainting after maintenance work. Waiting too long can leave cleaners, flooring installers, and leasing staff trying to work around wet paint.
In many units, the most efficient order is repairs first, then surface preparation, ceiling painting, wall painting, trim and doors, flooring, and final cleaning. The exact sequence can change. If flooring is being replaced, painters may prefer to complete walls and ceilings before installation, then return for careful baseboard or trim work if needed. If cabinets or countertops are being replaced, wait until those installations are complete before making final wall repairs and touch-ups.
Occupied turnover work and large vacancy turns require additional coordination. Confirm whether adjacent residents need notice, where materials can be staged, and whether painters can work during normal business hours. A dependable contractor should communicate daily progress, protect common areas, and leave the work site orderly at the end of each day.
Inspect the Finished Unit Under Real Lighting
A final walkthrough should happen after paint has dried and before the unit is released for cleaning or leasing photos. Do not inspect only from the doorway. Open blinds, turn on lights, and view walls from several angles. Natural and artificial light can reveal roller marks, missed edges, thin coverage, and patch flashing that were not noticeable during application.
Check the details that residents notice immediately: clean cut lines at ceilings and trim, smooth wall repairs, even color, coated door edges, paint-free hardware, and clean floors. Look at outlets, windows, cabinet edges, baseboards, and appliance openings for drips or overspray. Confirm that closets, utility areas, and the backs of doors received the same attention as the main rooms.
It is also wise to compare the completed unit to the approved scope. If a wall was scheduled for repainting, it should not be substituted with a touch-up simply because time became tight. On the other hand, a qualified inspection may identify an area that does not need repainting, allowing the team to focus budget where it will improve the resident experience most.
Build a Repeatable System for Every Vacancy
The most efficient apartment turns are not rushed. They are organized. Maintain a standard paint specification, a written checklist, unit photos, and a simple record of recurring repair issues. Over time, those records can reveal patterns such as repeated moisture damage, poor ventilation, failing caulk, or high-traffic areas that need a more durable coating.
For property managers in Topeka and surrounding communities, a professional painting partner can help set a realistic turnover scope, coordinate with maintenance schedules, and complete each unit with clean, consistent results. Royal Painting approaches apartment work with dependable scheduling, careful preparation, and a final finish that helps units show well.
A fresh coat of paint should make the next step easier, not create another item on the punch list. When every unit follows the same disciplined process, your team can turn keys with greater confidence and give incoming residents a home that feels properly cared for.