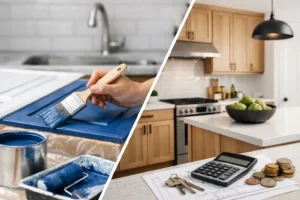
A small scuff near a light switch can make an otherwise clean room look unfinished. The challenge is that knowing how to match touch up paint is about more than finding a similar color name. A repair must match the wall’s color, sheen, texture, and wear level, or the touched-up spot may stand out more than the original mark.
For Kansas homeowners, paint matching can be especially frustrating in rooms with strong sunlight, busy family spaces, or walls painted several years ago. A careful process can prevent unnecessary repainting, but there are times when repainting a full wall is the cleaner, more reliable choice.
Start With the Original Paint Information
The easiest match is the paint already used in the room. Check your garage, basement, utility room, or storage shelves for leftover cans. Even a small amount of paint can be enough for a minor repair, provided it has been stored properly and still mixes smoothly.
Look for the label details: manufacturer, color name, color number, paint line, finish, and base type. A color name alone is not enough. The same named color can look different across product lines, and a flat finish will not blend like an eggshell or satin finish.
If you have a project folder, estimate, or invoice from your painting project, it may include the exact paint specification. This is one reason professional painters document products and finishes when completing a home. It makes future maintenance faster and more accurate.
Before using stored paint, stir it thoroughly. Paint separates over time, and pigment settled at the bottom of the can can cause an uneven match. If the paint smells unusually sour, has hardened chunks, or will not mix back to a smooth consistency, it is better to replace it than risk a patchy repair.
How to Match Touch Up Paint When You Have No Leftovers
Without the original can, the best starting point is a physical sample from the painted surface. Avoid bringing in a loose paint chip, dust, or dried scrapings from a damaged area. Those samples are often too small or contaminated to produce a dependable match.
When possible, remove a small section from an inconspicuous location, such as behind a switch plate, inside a closet, or behind a removable piece of trim. Take care around electrical components, and do not cut into drywall where it could create a larger repair. A professional can collect and repair a sample area cleanly if you are unsure.
A paint store can scan the sample and create a custom color formula. This is helpful, but it is not a guarantee of a perfect blend. Paint scanners read the current appearance of the sample, including years of fading, cleaning, and exposure. They also cannot fully identify the original sheen or wall texture.
Buy a small sample or quart first rather than committing to a full gallon. Apply it to a test area, let it dry completely, and inspect it at different times of day. Wet paint often looks lighter or darker than the final color, so judging it immediately can lead to the wrong decision.
Match the Sheen, Not Just the Color
A close color match in the wrong sheen is one of the most common reasons touch-ups fail. Sheen controls how much light reflects from the surface. A repaired spot may look like a dull patch on a satin wall or a shiny patch on an eggshell wall, even when the color is nearly identical.
Flat and matte finishes are usually the most forgiving for touch-ups because they reflect little light. They are common on ceilings and some low-traffic walls. Eggshell and satin finishes offer more washability, but they make overlap lines and uneven application easier to see. Semi-gloss is often used on trim, doors, cabinets, and moisture-prone areas, where even slight differences in gloss are noticeable.
Do not assume that all paints labeled eggshell or satin will look the same. Sheen levels vary by manufacturer and product line. For the strongest chance of a clean repair, match the brand and product line whenever possible.
Prepare the Area Before Applying Paint
Touch-up paint cannot hide dirt, grease, loose drywall material, or a poorly repaired hole. Clean the marked area gently with a mild cleaner and allow it to dry. If the wall has a stain, address the cause first. Water stains, nicotine residue, ink, and cooking grease may bleed through new paint without the right primer.
For nail holes and small dents, use lightweight spackle, let it dry, and sand it smooth with fine-grit sandpaper. Wipe away sanding dust before painting. The repair should feel level when you run a hand across it. A raised or rough patch catches light differently and can remain visible even with a perfect color match.
Texture matters, too. Smooth drywall, orange peel, knockdown texture, and hand-troweled finishes all accept paint differently. If the wall is textured, rebuild the texture before painting rather than covering a flat repair with color alone.
Apply Touch-Up Paint the Right Way
The application method should match the original surface as closely as possible. If the wall was rolled, a small roller with a similar nap usually blends better than a brush. A brush can leave visible strokes and a different surface texture, especially on larger patches.
Use a light hand. Load the roller or brush sparingly, then feather paint slightly beyond the repair instead of creating a thick, defined square. For a small scuff, gentle dabbing can work well. For a larger patched area, rolling from the repair outward helps replicate the wall’s existing texture.
Avoid applying several heavy coats in one sitting. Excess paint creates a raised edge and can produce a sheen difference. Apply a thin coat, let it dry, then assess it in natural and artificial light before deciding whether a second coat is needed.
A useful rule is to keep the repair small when the damage is small. The more surface area you cover, the more opportunities there are for a difference in color, sheen, or texture to show.
Why a Perfect Formula Can Still Look Different
Paint changes after it goes on the wall. Sunlight can fade exterior-facing rooms. Cleaning products, cooking residue, humidity, and everyday wear can subtly alter the finish. Even walls painted at the same time may look different from one side of a room to another because of window exposure and furniture placement.
This is why a store-matched sample may be technically accurate but still fail to disappear. The new paint is fresh, while the surrounding wall is aged. In some cases, the difference becomes less noticeable after the paint cures. In others, it remains obvious, particularly on darker colors, cool grays, deep blues, and walls with satin or semi-gloss finishes.
Lighting can also mislead you. A color that seems right under warm interior bulbs may look too green, blue, or gray in daylight. Check the repair near windows, under ceiling lights, and in the evening before calling it finished.
Know When to Repaint the Whole Wall
Touch-ups work best for small, isolated marks when you have the original paint and finish. Repainting the entire wall is usually the smarter option when the paint is several years old, the damaged area is large, there are multiple repairs, or the sheen mismatch remains visible after testing.
Painting wall to wall gives the surface one consistent color and finish, often at a lower cost than repeated attempts to hide mismatched spots. Stop at a natural break, such as an inside corner, doorway, or ceiling line. Painting only part of an open wall can leave a visible transition.
For occupied homes, rental turnovers, offices, and apartment common areas, this decision also protects the overall appearance of the property. A clean, uniform wall makes a better impression than several noticeable patches. Royal Painting can assess whether a targeted repair will blend properly or whether a full-wall repaint will deliver the more polished result.
Keep a Record for Future Repairs
Once your repair is complete, label any remaining paint with the room name, wall location, color number, sheen, and date. Store it in a sealed container away from extreme heat and freezing temperatures. A small, well-labeled touch-up container can save considerable time the next time a moving box, pet, chair, or backpack leaves a mark.
If a touch-up still catches your eye after it has dried and been viewed in normal lighting, trust what you see. A full-wall repaint may take more material, but it is often the simplest path to the clean, consistent finish your space deserves.